皆さん、こんにちは!
今月に入って冷やし始める人がチラホラでてきましたので、極冷のマニュアル的なものを作っていきたいと思います。
石や板の個体差もありますから全てに万能とは言いませんが、だいたいのシステムでいけるとは思います。
Hello,everyone!
As more people started to cooling this month, I made a manual for extreme cooling.
Because there are individual differences of CPU and board, can not be said to be versatile.
But I think that it is OK with most systems.
まずは基本設定からです。
7700kとAPEXで説明していきたいと思います。
First of all, basic setting.
I will explain with 7700k and APEX.
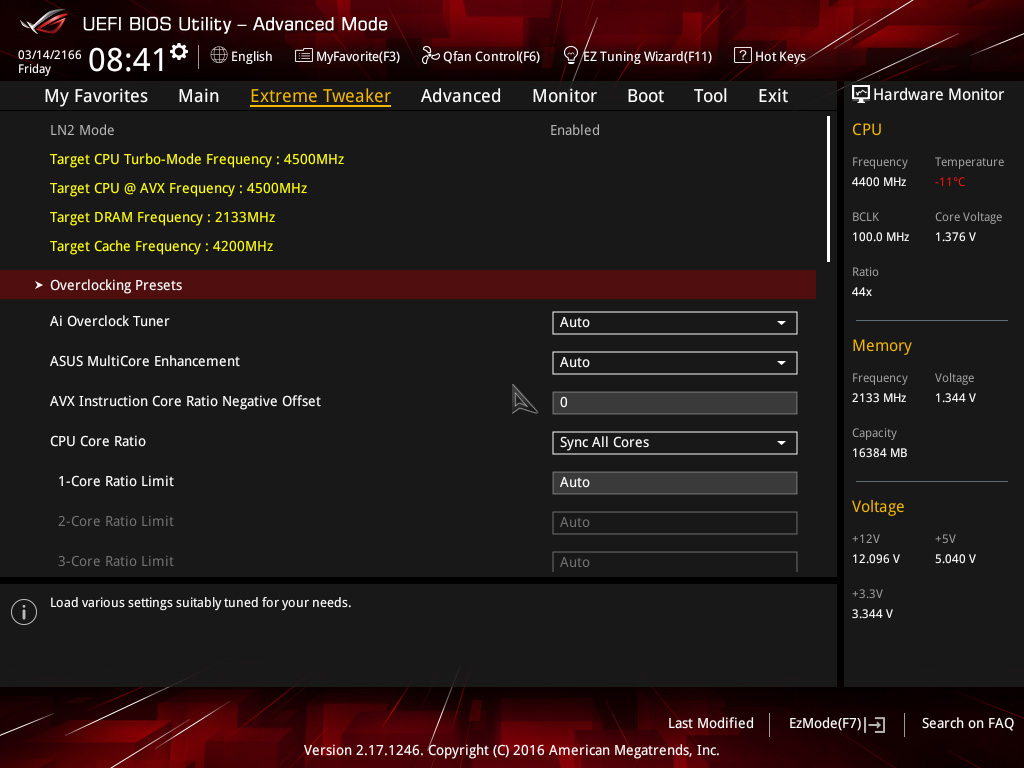
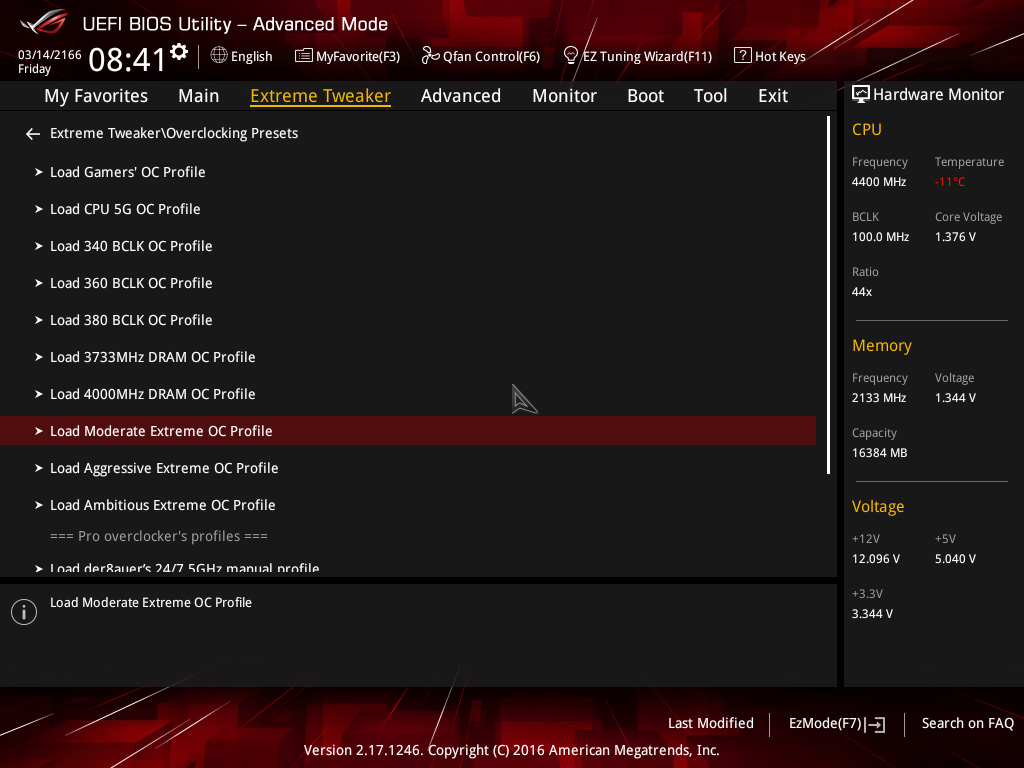
まずはCMOSクリアした後、BIOSに入りExtreme TweakerからOverClocking Presets、Load Moderate Extreme OC Profileにセットします。
これで各種電圧や数値がLN2用の最適な設定になるように自動設定されているハズです。
After clearing CMOS, go from Extreme Tweaker to OverClocking Presets in BIOS and set it to Load Moderate Extreme OC Profile.
Then the various voltages and numerical values are automatically set to the optimum setting for LN2.
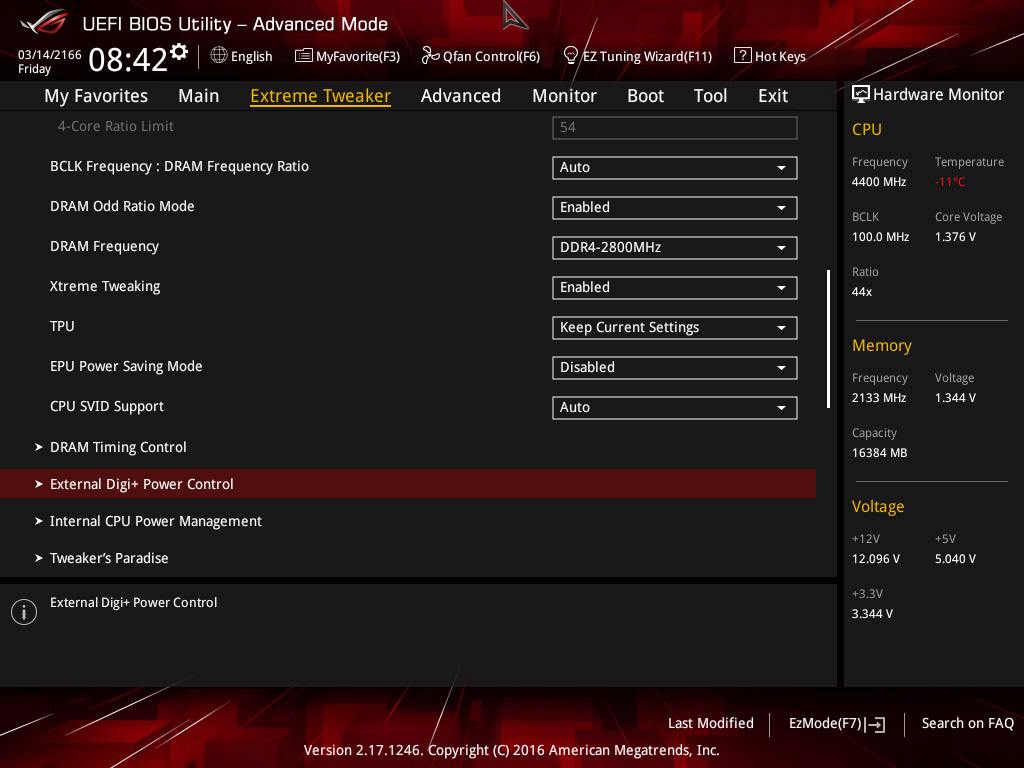
本来なら、このままで冷やしていって行けるハズ?なのですが、変更した方が良い箇所もあります。
Extreme Digi+ Power Controlに入ります。
You should be able to cool it.
But it is better to change some items.
Enter Extreme Digi + Power Control.

画像のようにCPU Load-line CalibrationがLevel7、CPU Current Capabilityが140%に自動設定されてると思いますが、ここをCPU Load-line CalibrationをLevel6、CPU Current Capabilityを110%に変更します。
CPU Load-line Calibration is set to Level7 and CPU Current Capability is set to 140% like the image.
Change here CPU Load-line Calibration to Level6, CPU Current Capability to 110%.
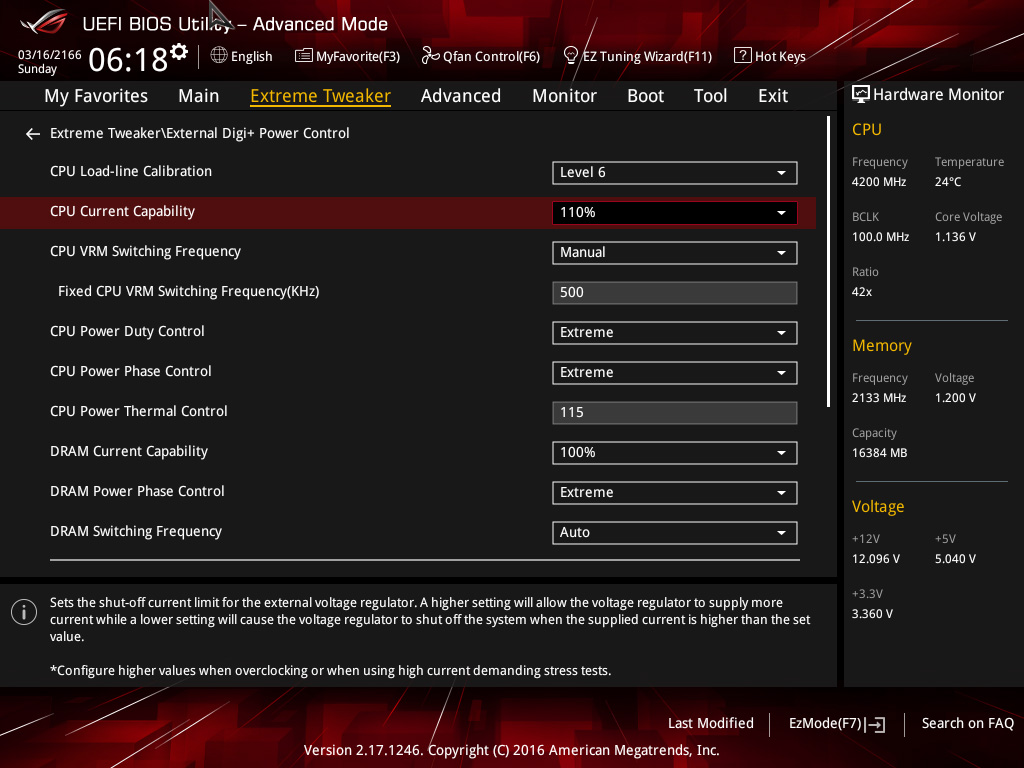
理由としてはピーターの作ったプロファイルがExtremeすぎて(笑)ここが7と140%のままだと全然クロックが上がっていかなかったり、ベンチが走らなかったりする石が結構な確立であるからです。
Peter’s profile is too Extreme…lol
If you set Level7 and 140%, there are many CPUs that the clock can not go up and can not run benchmark.
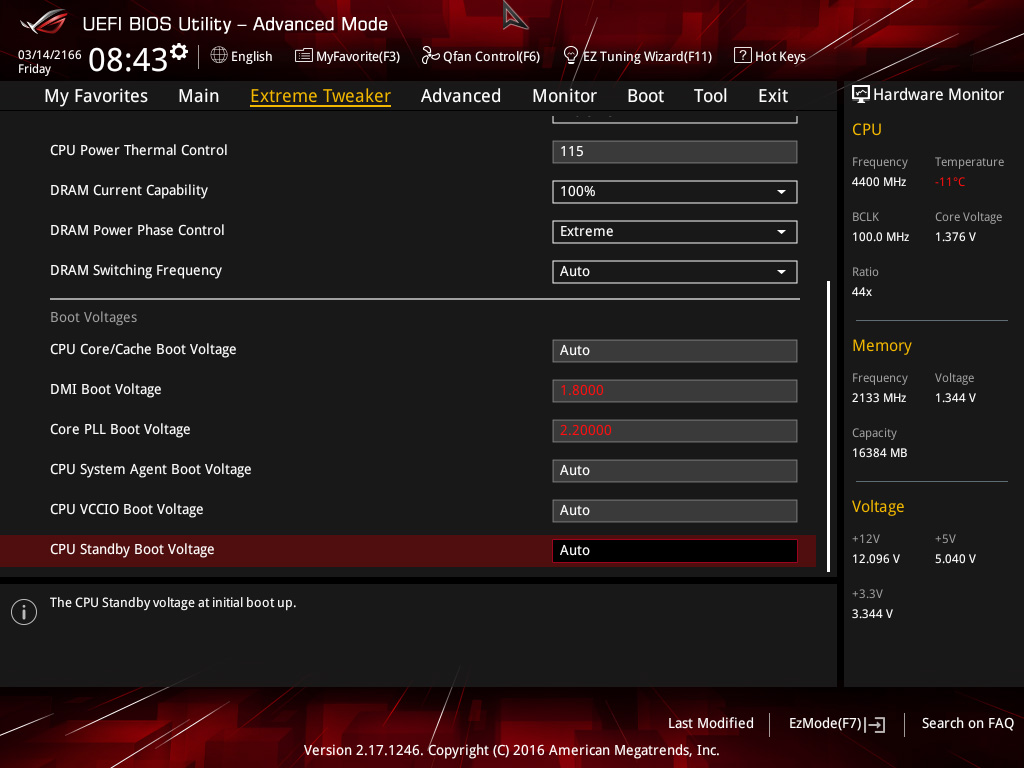
次に同じくExtreme Digi+ Power Controlの中のDMI Boot VoltageとCore PLL Boot Voltageを、Autoから画像のように1.800v、2.20000vにそれぞれ変更します。
Next, change the DMI Boot Voltage and Core PLL Boot Voltage of Extreme Digi + Power Control from Auto to 1.800v and 2.20000v like the image.
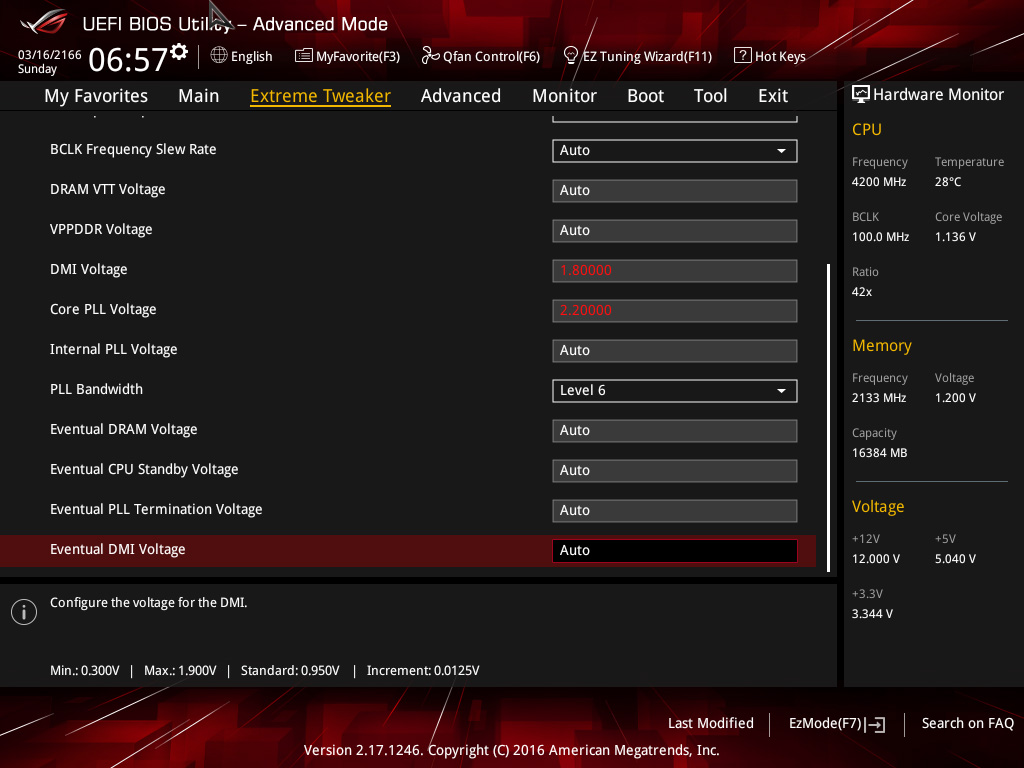
Tweaker’s Paradiseに入り、DMI VoltageとCore PLL Voltageも同じく1.800v、2.20000vにそれぞれ変更します。
Enter Tweaker’s Paradise, change DMI Voltage and Core PLL Voltage to 1.800v and 2.20000v as well.

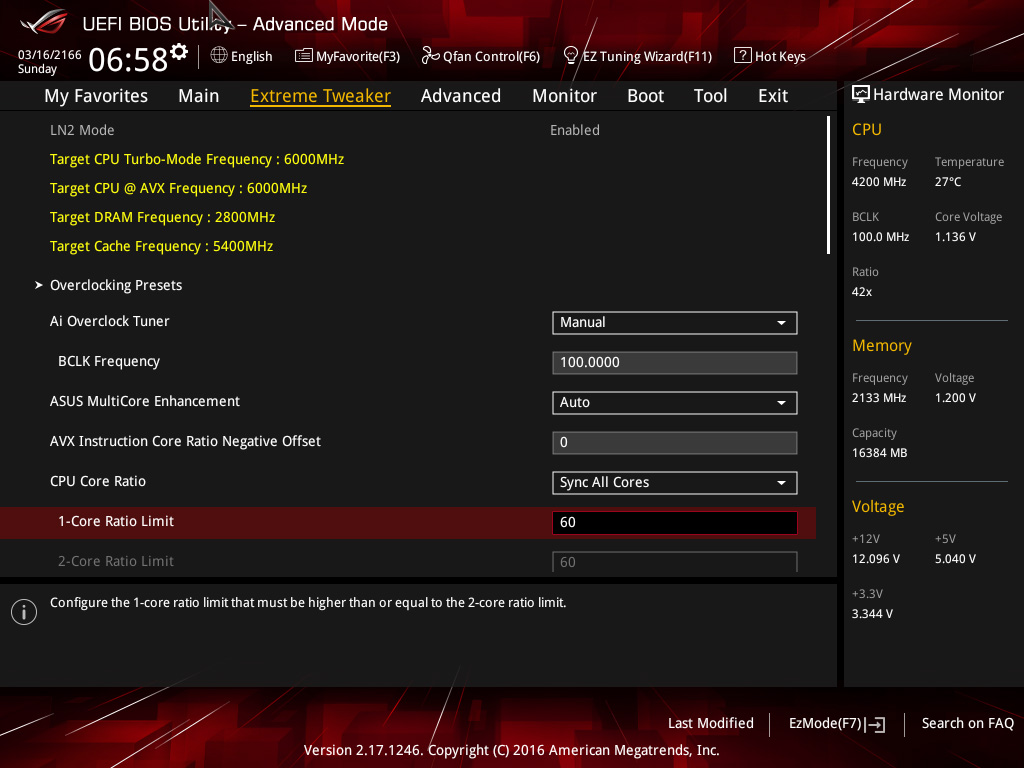
次にExtreme Tweakerの1-Core Ratio Limit を60に設定します(CPUがBCLK100x60=6000MHzになります)
Set 1-Core Ratio Limit of Extreme Tweaker to 60 (CPU will be BCLK100 x 60 = 6000MHz).
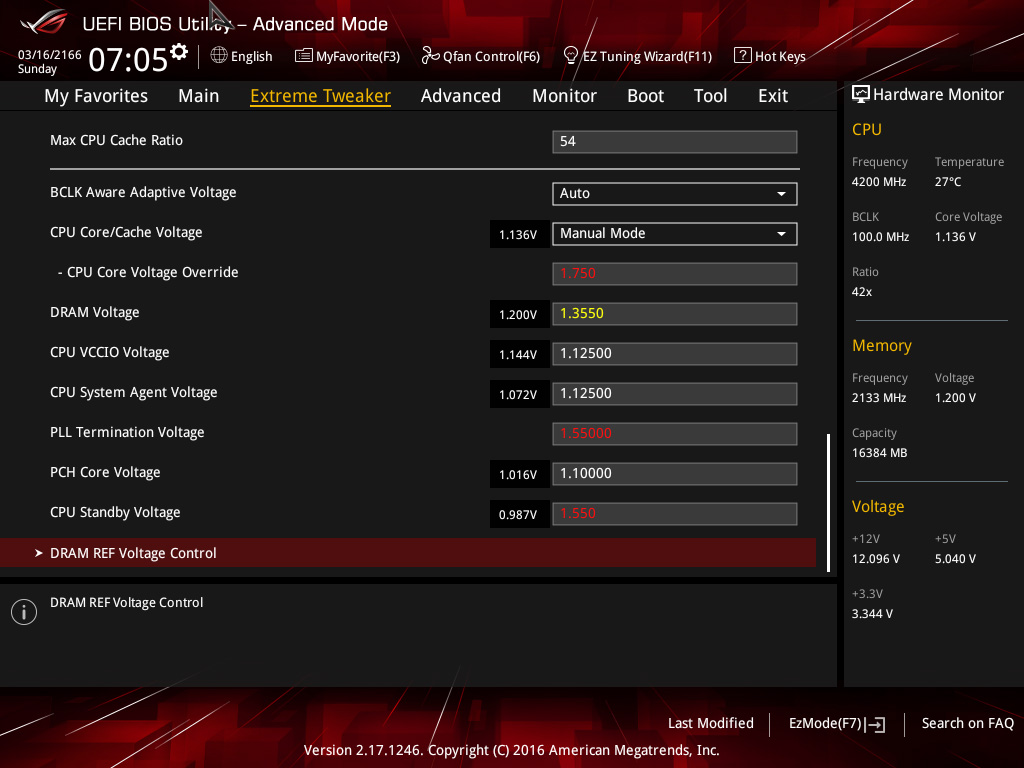
CPU Core Voltage Override を1.750vに変更します。
Change CPU Core Voltage Override to 1.750v.
次にAdvancedからCPU Configurationに入ります。
Next, enter CPU Configuration from Advanced.

画像のように変更します。
Change it like the image.
Hyper-ThreadingはDisabledにしてありますが、これはスーパーパイ用のセッティングであって、Win10などで使用する場合はEnabledにして下さい。
Hyper-Threading is Disabled, but this is setting for SPI.
So please set it to Enabled when using with Win10 etc.
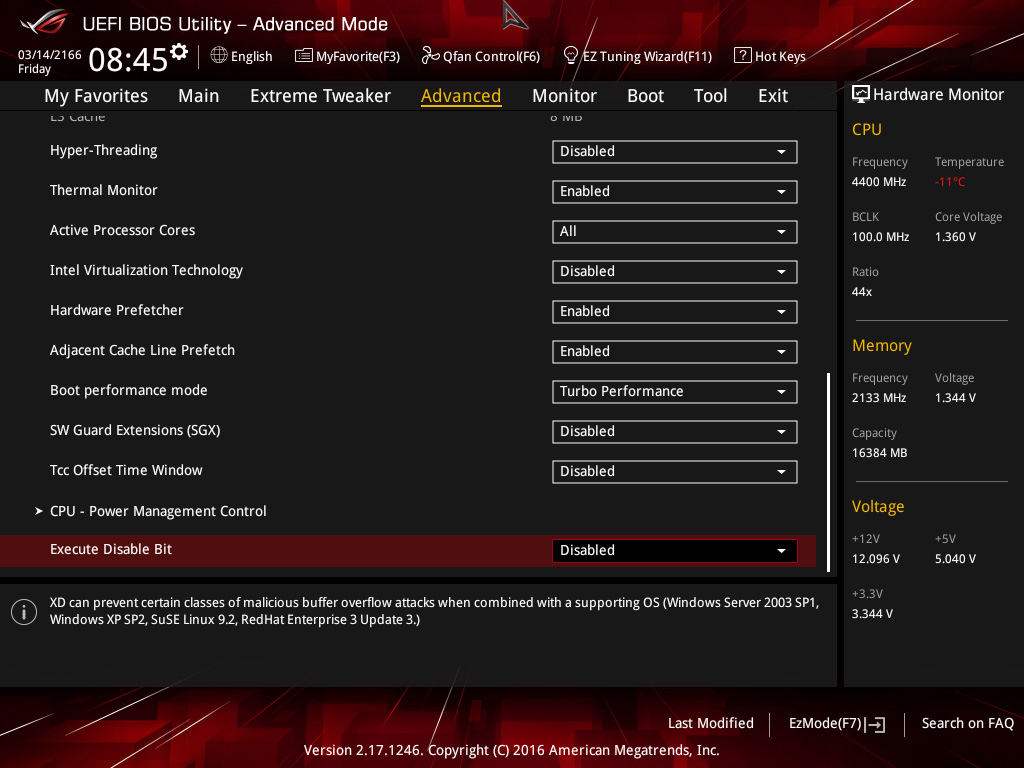
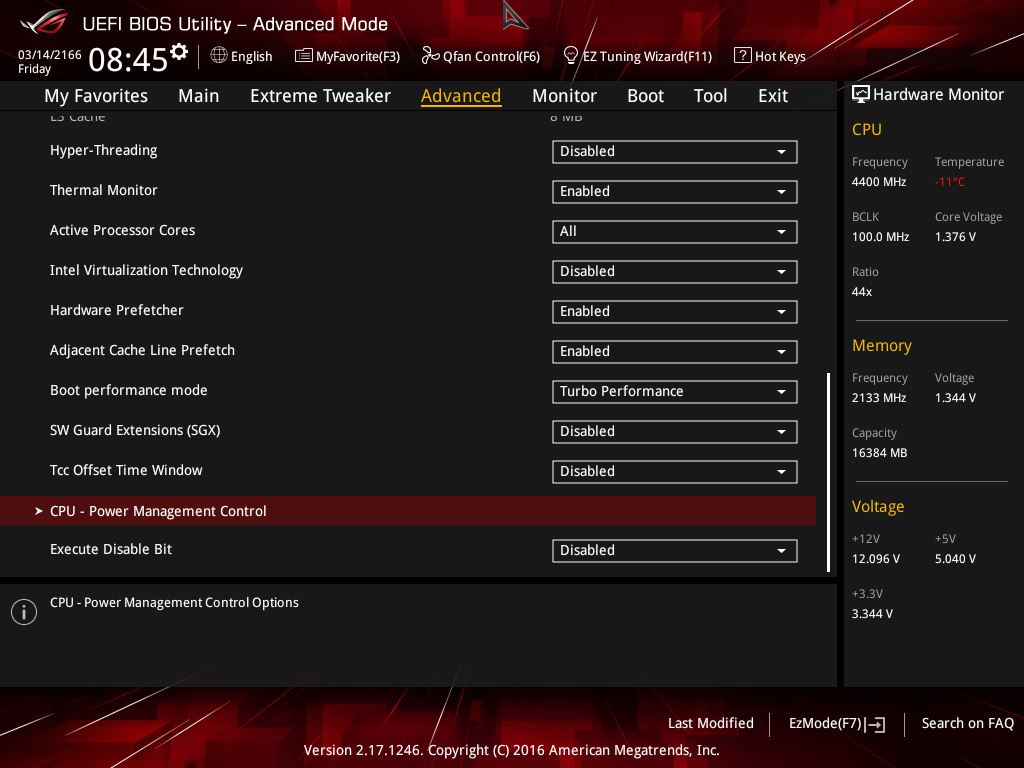
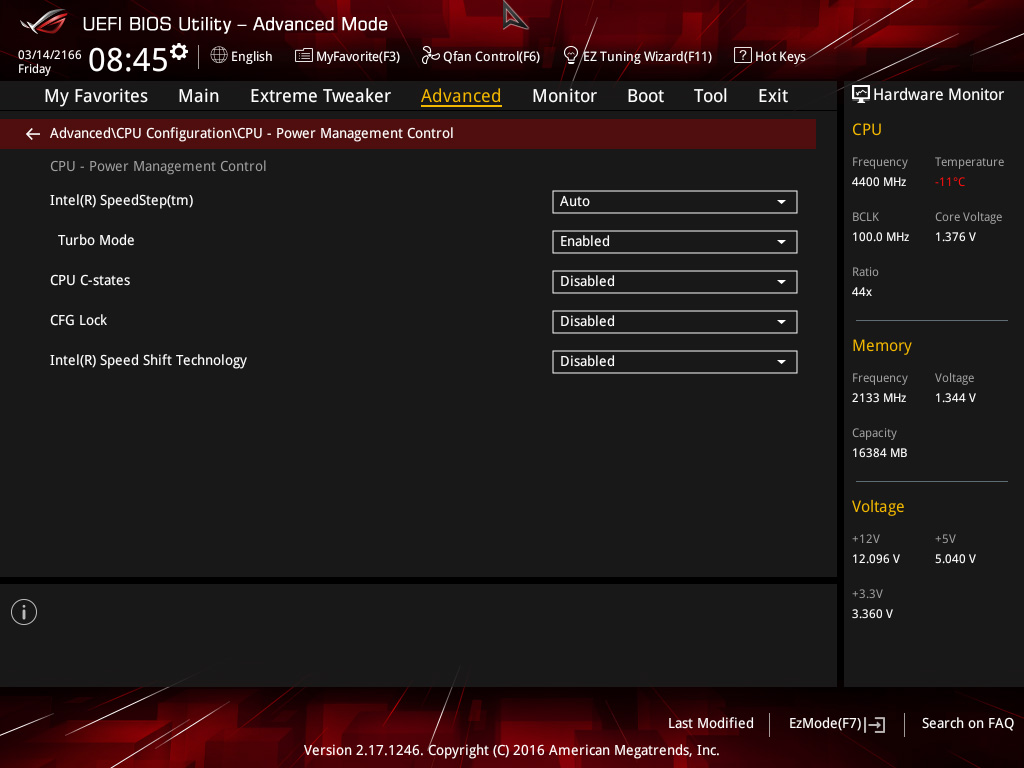
CPU-Power Management Controlに入ります。
画像のように変更します。
Enter CPU-Power Management Control.
Change it like the image.
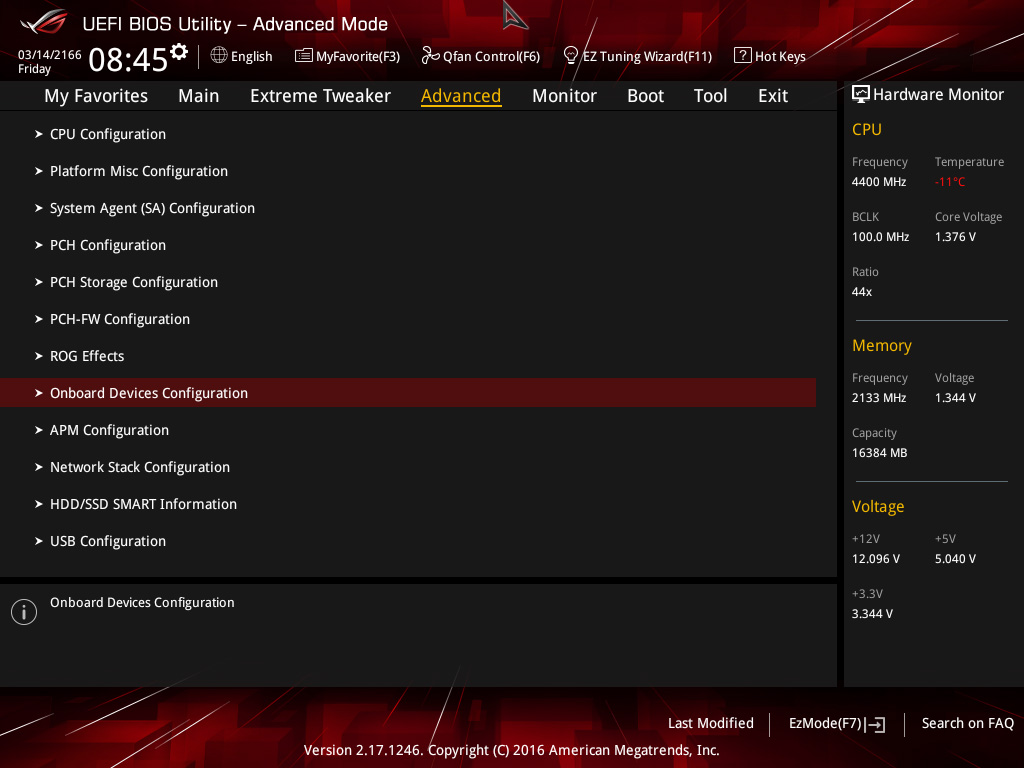
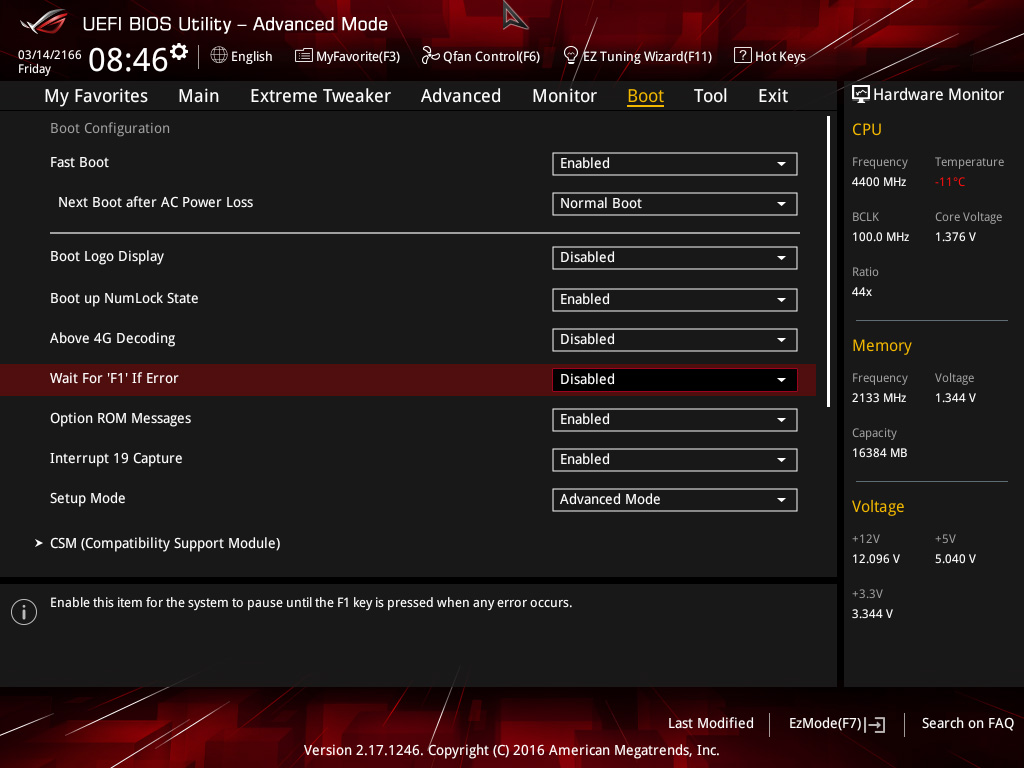
Onboard Devices Configurationに入り画像のように変更します。
Enter Onboard Devices Configuration and change it like the image.

Bootの項目に入り、画像のように変更します。
Enter the item of Boot and change it like the image.
これで、CPUを零下で動かす最低限のセットアップは終了です。
次回から一発でこの設定を呼び出せるように、Profileに保存しておきましょう。
Complete the minimum setup to move the CPU below 0.
Let’s save it in Profile.
You can recall this setting in one shot from next time.
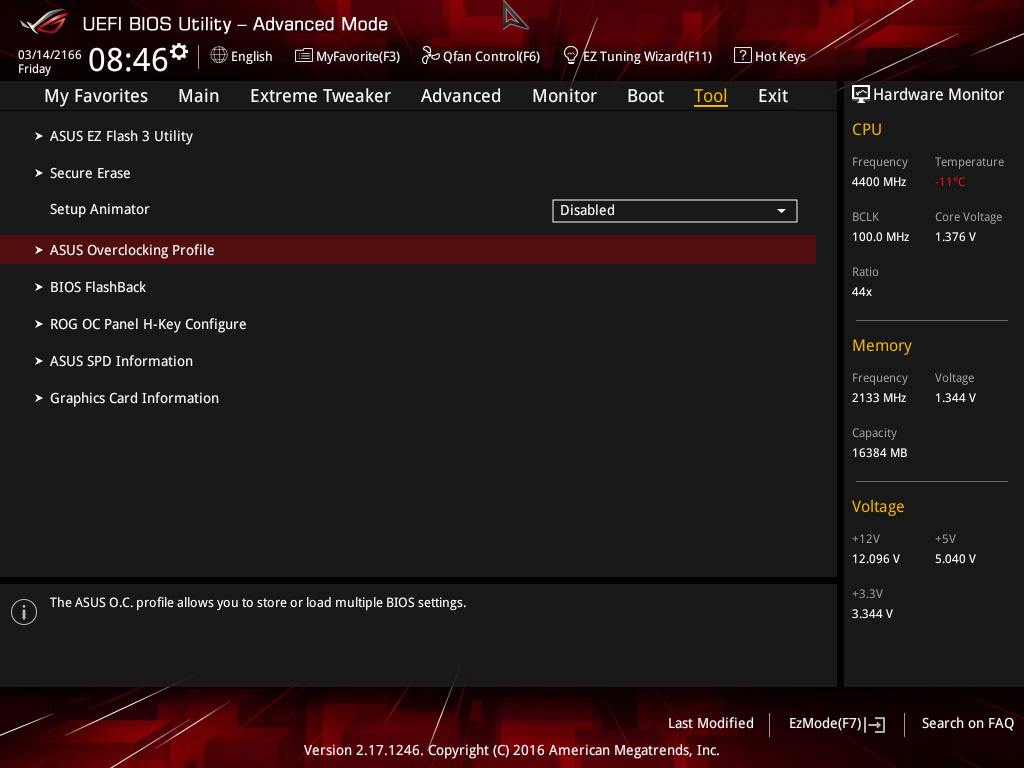
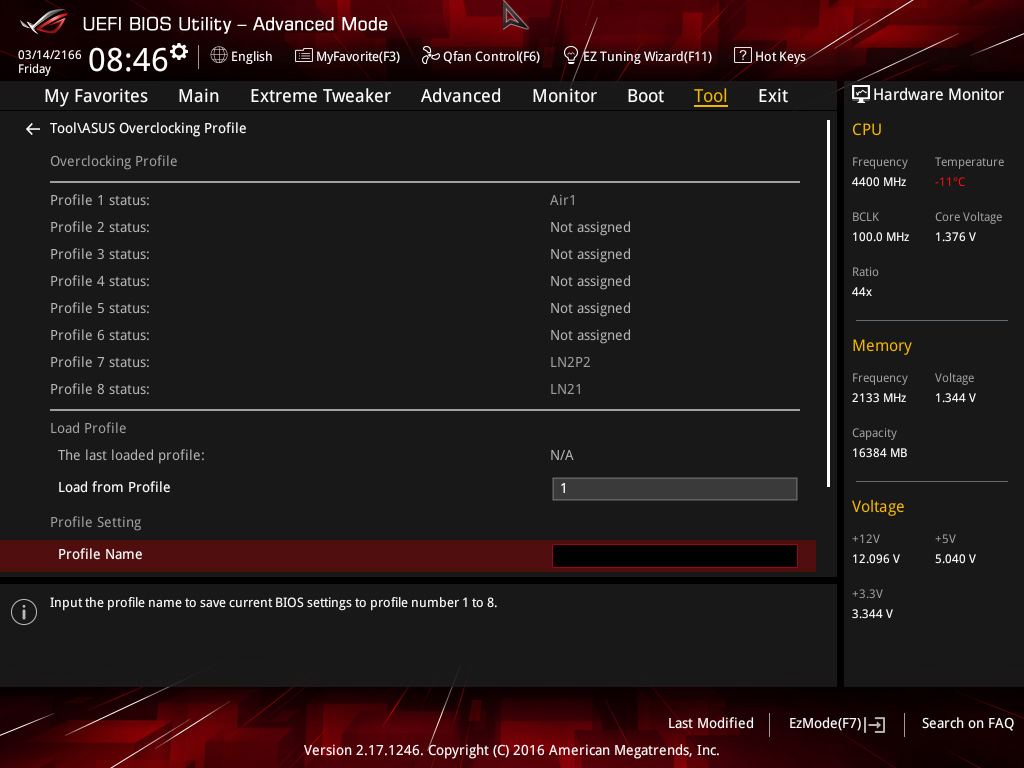
ASUS Overclocking Profileに入り任意のProfileネームを付けて保存します。
今回は仮にLN21と保存しました。
Enter the ASUS Overclocking Profile and save it with an optional Profile name.
This time it was temporarily saved with LN21.
では、ここからは、今回作ったプロファイルで実際に極冷をする手順を説明します。
Then, procedure to extreme cooling with the profile you made this time.
POTの設置、養生などの準備が整ったら、マシンを起動させBIOSに入り、BIOS画面のまま待機させ、POTの増し絞めをしながら零下まで冷やしていきます。
Start up the machine, enter BIOS, wait for BIOS screen.
Cool down to below 0 while raising the pot little by little.
-90℃から-100℃まで温度が落ちたら先ほど作成したプロファイル(仮名 LN21)を呼び出し起動させます。
When the temperature down from -90c to -100c, use the profile you made earlier (pseudonym LN21).
なぜ?この温度かというと、稀にCBB解除スイッチを使ってもこの温度でbootできないCPUがあるからです。
-100℃もあれば、ほとんどのCPUはプロファイルどおり1.75vのVcoreで6GHzでOS boot出来ると思います。
Why is this temperature?
Some CPUs can not boot at this temperature even if you use the CBB switch.
Most CPUs will be able to boot OS at 6GHz with Vcore1.75V according to the profile if it is -100c.
OSを起動させたらCPU-ZとターボVを立ち上げてVcore1.75vで6GHz駆動してるか確認します。
確認がとれたらターボVを使ってVcoreを1.85vに設定します。
Please check whether running at 6GHz with Vcore1.75v using CPU-Z and turboV after boot.
After checking, set Vcore to 1.85v using TurboV.
この設定のままで温度を下げれる限界まで下げていきます。
POTの温度が下がりきったらターボVを使ってVcoreを1.9v以上に設定し、CPUの倍率をCPU-Zでクロックを確認しながら100×61倍..62倍..63倍…と、フリーズする限界まで上げていきます。
With this setting, lower the temperature to the limit.
When the temperature of the POT drops to limit, set Vcore to 1.9V or higher using TurboV.
While verifying the clock with CPU-Z, up ratio 100×61…62…63…until freez.
倍率の限界が分かりましたら、次に限界の倍率に設定した後、今度はBCLKを100.00から100.10….と0.1刻みで少しずつ上げていきます。
これでCPUの大まかな限界クロックを探る事が出来るはずです。
後は必要に応じてCoreをALL(4core)から3core,2core….と変更して、同じ手順でそれぞれの限界クロックを探っていきます。
After knowing the limit of the ratio, setting the limit ratio and up BCLK from 100.00 to 100.10….in 0.1MHz.
You should be able to explore the rough limit clock of the CPU.
After that, change Core from ALL (4core) to 3core, 2core….as necessary, and search each limit clock by the same procedure.
今回は以上です。
次回は、応用編に移りたいと思います。
Today was the basic setting.
The next time is practice.
NEXT
Extreme Cooling Beginners Manual (APEX) Basic setting 2